Tuesday, December 21, 2010

The Adventures of One-Upping Yourself

Yesterday I spent all day in the studio trying to re-do a previous session that I thought sucked. I ended up spinning my wheels all day trying to one-up the last session and finally threw my hands up in despair, abandoning the new session completely. I took the rest of the day off and tried to forget that I just wasted another 6 hours with still nothing to show for my efforts. In my despair, the next day (today) I opened up the first session and re-listened to the files I captured initially. I was hoping to gain insight on what I needed to do to get what I wanted to get. Turns out, I loved everything I captured in that very first session. This means I can start tracking vocals and adding overdubs. Yea for me!

I learned two things from this experience:

1) My "perfectionism" hates anything I do initially, be it songwriting or recording. I usually have to get some time-distance between what I've done and listen with a fresh perspective at a later date, which could be the next day, several months, or even a year. Any create-music activity is myopic, and I've found that I need to frequently back away from the tree so I can glance at the forest. Many times the forest-view makes the individual tree look less odd.

2) Sometimes I have to try to one-up my last attempt in order to discover that that attempt was actually pretty good in the first place. This applies to every aspect of songwriting and recording. I can't tell you how many times I've tried to replace what I thought were crappy lyrics, only to flail in trial-and-error land for way too long. But somehow through the process I came to discover that my initial inspiration worked just fine. Same thing applies to tracking and mixing. Go ahead and experiment or try to one-up yourself. But don't be afraid to accept the original idea when nothing's turning out the way you hoped it would.

Now, sometimes I do come up with something better. In fact, that's usually why I attempt to one-up in the first place. Whether you fail or succeed, I actually recommend the one-up attempt because it's great education and practice all the way around. Sometimes it produces great results. But sometimes it's the only thing that can help you realize that you had something good before you started one-upping. And through the process you learn yourself.

I love the saying that an expert is someone who has made all the mistakes that can be made. The implication in this statement is that experts became experts by making mistakes, learning from them, and then applying that knowledge to their betterment. In the process, the expert-in-training eventually learns to trust their own judgements. However, this can take years and years of making mistakes to discover. Don't be frustrated about making mistakes; they're part of the joyride toward success.

Happy Creating!

For daily tips on songwriting, music production, recording, including a daily ProTools tip, follow Create Music Productions on Twitter: @CreateMusicPro

Saturday, October 23, 2010

5 Ways to Copy Regions in ProTools 8

In Pro Tools there are 50 ways to do most everything. In this screencast I show you 5 ways to copy a region (as well as multiple regions) in Pro Tools 8, including all their keyboard shortcuts. Enjoy!


I know, there are 150 other dudes on Youtube that show you the same thing. But @RobinFrederick reminded me once that people need to see the same things from multiple sources because one time it will really click for them. I hope this screencast made it click for you.

Do you have another and/or better way you like to copy regions? Please let us know in the comments.

@TheAudioGeek pointed out a few I left out: 1) Commands Focus keyboard shortcuts for copy/paste: C = copy, V = paste; 2) You can access copy/paste options from the right click menu; and 3) the keyboard shortcut to open the Region Looping dialog is op+cmd+L. Thanks @TheAudioGeek!

Happy ProTooling!


For daily tips on songwriting, recording, and music production, including a ProTools tip, follow Create Music Productions on Twitter: @CreateMusicPro

Monday, October 18, 2010

Hearing Comb Filtering (Screencast)

I was so happy when Joe Gilder from www.homestudiocorner.com mentioned phase issues in his recent post about Using Multiple Microphones. Why? Because I had just made this screencast and wondered if anyone would care about learning to recognize comb filtering. See, recording with two microphones often leads to the signal arriving at each microphone at different times. Two signals arriving milliseconds apart creates comb filtering: an ugly sound that will kill the tone of any instrument. It also happens when internal latency issues in your DAW causes two versions of the same signal to playback at slightly different times.

When I first started recording I read about phase issues and comb filtering but I had no idea what it sounded like. This screencast shows you how to create comb filtering effects so you can instantly recognize that evil sound. I worked in ProTools 8, but you should have all the same tools in your DAW of choice.

http://www.youtube.com/watch?v=2QPAFJyVb7U

I would like to add two things that I forgot to mention in the screencast. Often a signal will arrive at two microphones less than a millisecond apart, which can sound worse than the one, two and three millisecond varieties. To hear the effects of that kind of comb filtering, just enter a number less than 44 into the "Samples" portion of the Shift Region Dialog.

Secondly, how can you check for phase issues when recording with two mics? First solo each microphone and get an idea of the tone of each mic individually. Then play them together and listen for comb filtering. Now that you have an idea of what that sounds like, it shouldn't be hard to recognize.

If you hear comb filtering, all is not lost. You should be able to zoom way into both waveforms and carefully line them up so they're in phase again. It might take a few tries, but you'll get it if you use your ears. If the comb filtering arises because of internal routing delays (often caused by effects, parallel compression type techniques, or complex bussing), you may have to use a time adjust plug-in to compensate for the latency between signals. I'm not going to get into how to do that in this post, but you should be able to find tutorials online.

Happy Recording!

Follow Create Music Productions on Twitter for a daily dose of recording, songwriting, and music production tips, including a daily ProTools tip: @CreateMusicPro

Wednesday, October 13, 2010

When Silence is NOT Golden: Troubleshooting Silence During Recording

It’s happened to all of us: you’re in the middle of a session, everything’s flowing, and you’re in the creative zone. You quickly use your DAW to record a flowing melody, lay down a virtual instrument part, or capture a killer guitar riff. But—suddenly—for no obvious reason, you can’t hear what it is you’re trying to hear. You tickle the keyboard controller and…nothing. You “check—one—two” on the mic and it’s quieter than an anechoic chamber. You try to playback your vocal track through your “hit single” effects chain and the only thing you hear is your computer humming away. At this point, even crickets would be a welcome reprieve from the deafening void. You run through the troubleshooting checklist in your mind and hope it’s something easy. Mute? Solo? Wrong input? Nada. Nothing. Complete silence. So, what do you do when you’re in the middle of an important session and you just can’t make a sound?

There are almost a hundred reasons for silence in a typical DAW setup. Think about everything that could go wrong from sound source to monitor output. From the time it takes to open a session and become immersed in the sonic world of the song, the probability of making little engineering mistakes is high. Something technical is bound to go wrong, especially if creative frenzy has banished left-brain thinking into the naughty corner.

Speaking as someone who is simultaneously a songwriter, engineer, producer, AND performer, sometimes I don’t have the tenacity necessary to successfully unify all four personas with terminator-like precision. Usually the technical hat is the first to blow off into sloppy land. When something goes wrong, I am not in the frame of mind to systematically troubleshoot that kind of issue.

To help me stay in the zone, with minimal tech-think, I’ve compiled a simple checklist of categories of the myriad of things that could be wrong when I can’t hear my track, mic, instrument, virtual instrument, effects, send, or can’t record what it is I’m trying to record:
• Is the volume up?
• Is it routed correctly?
• Misc.
• Is it plugged in?
• Is it powered up?
• Bad equipment?
• If all else fails…

I explain all seven in the following post.

I’m speaking from a DAW perspective and as a ProTools user, but I’ve tried to make my checklist as universal as possible. My advice is geared toward the average home-studio owner. I’m assuming everyone has some combination of computer, interface, pre-amp, external hard drives, controllers (surface, pad, keyboard), guitars + amps, keyboard/synth, mics, DI, headphones, and monitors. I’ve organized the list with the most probable cause at the top and the least likely cause toward the bottom.


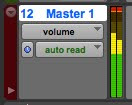
Checklist: Why Can’t I Hear What I Need to Hear?

1) Is the Volume Up?
This has to be the number cause of madness because it’s so hard to sort through. Think about how many volume-type controls there are in a typical DAW set up? You have a gain/trim knob on your pre-amp and your interface. Are those sending enough level? On the ProTools M-box, the mix knob controls input level verses mix level. Is that where it needs to be? Then your interface probably has controls for monitoring level and possibly separate controls for headphones. Are they loud enough? Maybe your headphones or monitors have individual volume controls? Is your instrument’s volume control where it needs to be (guitar, synth, keyboard, controller, etc.)? Did you accidentally knock a slider, push the wrong pedal, or rub a volume knob the wrong way? If you’re tracking a guitar playing through a pedal board and then through an amp, all being captured by a mic, think about the various places the volume could be hindered. Has the pad switch on your mic, interface, or DI box cut your volume dramatically? Is the fader on your control surface at unity gain?
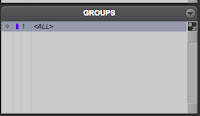
Internally you must consider the level of each individual track, including audio volume, MIDI volume, aux tracks, etc. Has a track been muted? Is solo engaged somewhere in your session? Do you have any submix buses to worry about? Are your sends at the level they need to be? Is a send muted? Soled? If you can’t hear an effect on a soloed track, did you forget to solo-safe the aux effect? Are your plug-in effects and/or instruments giving you the output you need? Has something been bypassed? Is your master fader at unity gain? Did you forget about previous automation moves that either mute the track or lower the volume? Did you mute regions or MIDI notes?

2) Is it Routed Correctly?
For the beginner, routing just plain hurts your brain. For the seasoned recordist, it still is a source of frustration at times. Externally, is the right cable going into the intended input? Internally, have I assigned the correct input and output on each track? Did I send the output to a submix or group bus that I forgot about? Are all my sends meeting up with the right aux track on the same bus? Is the headphone mix actually going to the vocalist? If a ProTools user, has the track been record enabled? After tracking, did you remember to take it off record-enable? Did you record-safe the track a while ago and forgot? What about MIDI? Think about how many communication failures can happen when syncing external MIDI devices or internal virtual instruments. Are the MIDI inputs and outputs assigned correctly? Are you communicating with your DAW on the right channel(s)? Is your MIDI track communicating with your virtual instrument through the correct channel(s)?

3) Misc.
Some common issues don’t neatly fall under the volume or routing category but can still trip you up during a session. Did you accidentally press or depress a weird button on your controller or MIDI device? Is a plug-in acting weird? If you can’t open a plug-in, is your iLok plugged in? Do you have input only monitoring engaged? Did you make inactive some of your tracks or plug-ins and forgot about it? If you have too many tracks, sometimes a DAW will freeze them or make them inactive. Did you pile on the tracks and forget about sequencer limits?
Then, you have to worry about computer glitches. Is your audio being routed through your computer correctly? Maybe the volume is down, muted, or the output is routed improperly? Maybe a driver needs to be initiated? Maybe a MIDI device needs to be set up internally before it can be used. If you plugged in your MIDI device after a session was opened, will your software allow this? (ProTools wants you to turn on drives and MIDI devices on before powering up or starting a new session.)

4) Is it Plugged in?
This sounds silly, but believe me, it’s happened to all of us. Is the cable plugged into your instrument or mic fully? Is that plugged into your interface/pre-amp/DI completely? Are your headphones plugged in? Monitors plugged in? Are all usb and/or firewire devices securely attached to both the device and the computer? Have any of the cables gone bad?

5) Is it Powered Up?
Is the power at the wall turned on? Is the power switch on your power conditioner, battery back-up, or surge protector leaning in the right direction? Do you have a device that requires external power or a battery, like a synth, MIDI keyboard, DI box, guitar pedal, etc.? Did you turn that device on? Is your guitar/bass active and require a fresh battery? Are the pedals on your pedal board connected securely to their power source? Maybe a power cable got yanked out somehow? Is the usb hub plugged in? Did you forget to switch on your external drives? Did you forget to engage the phantom power switch after plugging in your condenser mic? Monitors got juice? Finally, have any of the power cables gone bad? Did you blow a fuse? If there’s been an outage, sometimes I’ve had to unplug all powered devices from their power source and then plug them back in.

6) Bad Equipment?
This category comes near the end because it rarely happens. But if it does, it’s usually the last thing you consider. Failing equipment generally gives you some kind of indication that it’s on its way out, but not always.
Are you trying to play through a dead guitar jack? Did a tube give out in your amp? Has your interface finally given out or have a dead jack? Have your MIDI devices stopped communicating? Did your hard drive give up the ghost? Has your computer gone bonkers? Do you have the most current drivers or software update? Did your computer’s latest automatic update interfere with your recording software? Are your plug-ins compatible with your software’s most recent update? Is your sequencer too much for your outdated computer? The list could go on and on…

7) If All Else Fails…
I can’t give a technical explanation for this one, but computer geeks everywhere know the magic power of the restart. I can’t tell you how many times I’ve gone through the above checklist to no avail only to have a restart solve the problem. If a simple restart doesn’t work, then unplug all your powered devices and connections and wait a few minutes. Then plug them back in and Restart your computer and DAW. Why? Just trust me.
- - - - - - - - - - - - - - -

I have by no means created an exhaustive taxonomy of all the issues that could cause silence in your DAW environment in each of the seven categories. The explanations were meant to be suggestive. Hopefully the seven checklist items will save you from those “Oh, duh!” brain-fart moments where the obvious is playing hide and seek. Those moments are especially common in the throes of musical inspiration. If the checklist allows you to troubleshoot without thinking too hard about problem solving, I’ve succeeded with the goal of my post. With your brain successfully spared from functioning you can quickly return to your creative work. [Oooo, diss...insert sarcastic “ha-ha” here.]

Happy Recording!

Follow Create Music Productions on Twitter for daily tips on songwriting, recording, and music production: @CreateMusicPro

Sunday, October 3, 2010

Use Apple Loops in ProTools Sessions!

For those of you who have played around with GarageBand, you know that there are tons of decent loops and cool sound effects built into the program. Well, GarageBand folks aren't the only ones who get to have all the fun. Mac users can use Apple Loops and iLife Sound Effects in their ProTools sessions as well. The loops and sound effects are in .caf format, but if you drag them into the Tracks list from the Workspace, ProTools will convert them automatically.

Here's how it works: From the Workspace (op+;), browse Macintosh HD > Library > Audio > Apple Loops > Apple, and then audition sounds from either the "Apple Loops for GarageBand" folder or the "iLife Sound Effects" folder. Drag the sounds you like from the workspace into the ProTools Tracks list (View > Other Displays > Track List) and wait a few seconds for ProTools to create the appropriate track and convert 'em. Easy as pie!

But here's the catch...after importing a musical loop into your ProTools project you'll notice that it may be in a different key, tempo, time signature, or--if you're lucky--all three at once! If you're building a song around that loop, you'll just have to put your Identify Beat skills to work and make the necessary ruler adjustments for time signature and key signature. If you want a wayward loop to fit within an existing project, however, you'll have to pitch shift, use the TCE trimmer, or just scrap it altogether. If you're just using the sound effects, they don't usually have key/tempo/meter problems.

A small word of warning: Be careful how you use the GarageBand loops and sound effects 'cause anyone who has used GarageBand will instantly recognize most of 'em. If you're not concerned about originality, there's no problem. But for those who want to sound more than generic, I'd recommend employing them creatively. And by "creatively" I mean don't use them as the main riff. I hear undisguised GarageBand loops all the time in background music for various multi-media projects on the web and even on TV. I always think, "Really, did that composer not have the time or energy or self respect to be more creative?" But maybe that's just me.

Anyhoo, my point was let Mac users know that they have a bunch of free loops and sound effects that are available for use in their ProTools projects. And free is always better than not-free ;-)

Happy ProTooling!

For daily tips on recording, songwriting, and music production, follow Create Music Productions on Twitter @CreateMusicPro

Wednesday, September 29, 2010

Adding Character to a Virtual Instrument Sound Using Reverse Reverb

Just made a screencast that shows you how to add a little ambience to your virtual instrument sounds using the reverse reverb effect in ProTools 8 with stock plug-ins. Enjoy:


The audio and video quality sucks, but it's my first screencast so cut me some slack ;-)


For daily tips about recording, production, and songwriting, follow Create Music Productions on Twitter @CreateMusicPro

Tuesday, September 21, 2010

RANT: "...Due to Human Error."


One of my favorite movies is Stanley Kubrick’s 2001: A Space Odyssey. I’m not going to attempt to describe what it’s about, but I will say most of it revolves around “Hal 9000,” a supercomputer that runs the spaceship. Hal predicts that a part on the ship will fail, but the humans on the ship can’t find anything wrong with the part. The humans ask Hal if any computers like him have ever made an error. Hal confirms that the 9000 series “has a perfect operational record.” Hal can tell the humans are worried about whether he is malfunctioning or not, so he proposes his theory about the misdiagnosis of the failing part. “This sort of thing has cropped up before,” says Hal, “and it has always been due to human error.” What a great line!

My Dad used to work as an IT guy helping people with their computers. He had a saying: “You can usually fix a computer by replacing the nut at the end of the mouse.” His point? Most people cause their own computer problems. My point? Some people blame their music software for “sucking” when the problem is really the operator. Most of the time, I have to agree with Hal. If your music software sucks, it’s usually “due to human error.”

For example: a guy contacts me and tells me that he’s about to give up on GarageBand because it “sucks.” “I knew I should have got Logic,” he keeps repeating. I inquire about his problems and recommend that he schedule a 15 minute slot with me via iChat. “15 minutes?” he asks confused. “I’ll be able to get you up and running in 15 minutes,” I assure him. See, he was hating GarageBand because it “wouldn’t line up the beats properly.” He also didn’t know how to loop regions and complained that GarageBand was a pain in the butt to use. Sure enough, I showed him the quantize feature in GarageBand, how to loop, and made a few other basic recommendations in less than 15 minutes. Turns out, he had no recording experience, never watched the free instructional videos, and was entering MIDI information by “playing” the tiny on-screen keyboard with the trackpad. I thought to myself, “Yes, it must be GarageBand that sucks.”

Now, in the end of 2001: A Space Odyssey it turns out that Hal the supercomputer was indeed failing and the humans were right. Sometimes that’s the case in our world as well. The Audio Geek Zine recently reported that ProTools 8.0.4 has some serious issues for Windows users . But most of the time, frustrations with music software have more to do with a faulty user than a faulty program. So, before you go blaming your computer or your software, please think to yourself, “What have I done to prove that I am capable of making an informed judgment about the benefits or limitations of my software?” It sucks to enter notes with a trackpad on a tiny virtual keyboard. Buy a fricken $100 controller! The beats won’t line up? Get some rhythm, or at least learn how to quantize! GarageBand won’t loop? Yeah, it’s probably because the program is glitchy. That recycle sign that comes up when you move your cursor in the upper right hand corner of the region has no purpose…it’s just there to look cool. I agree, you’re right: buying Logic will solve all your problems. Increasing the complexity of a piece of software usually results in an easier learning curve. You are detecting my sarcasm, right?

MY ADVICE: before you throw up your hands in despair because your gear sucks, please first make sure that the problem is not “due to human error.”

For daily tips on recording, songwriting, music production, and ProTools, follow Create Music Productions on Twitter @CreateMusicPro

Monday, September 20, 2010

The Top Ten Mistakes of Newbie Pro Tools Users

During the day I work at a school where I teach teens music creation using Pro Tools. I also meet with people privately (in their homes) and online (via video chat) doing the same thing. In my instructional journeys, I’ve noticed that complete newbies to both recording and Pro Tools have the same kinds of problems. Fortunately for you, their pain is your gain. In the following post, I list the top 10 mistakes that Pro Tools newbies usually make either before or after purchasing Pro Tools…then I tell you how to remedy those problems. Simple as that.

1) No External Hard-Drive
People…use an external hard drive! When you save your session to your host computer’s hard drive, it has to work twice as hard to simultaneously run ProTools, access/capture audio files, AND run instrument and/or effects plug-ins. So, here’s what you do: save your session files to an external drive. Put your audio loops and samples on that drive. Love that drive. Back-up that drive. Whatever you do, just use one. Just make sure it's an AVID-approved drive spinning at least 7,200 rpm. Evil things can happen if it's too slow (like most of the "tiny 'n' cute" drives running at 5,200 rpm) or is running an incompatible chipset.

(@ObediaTutor correctly pointed out that AVID actually recommends using an internal drive that's separate from your host drive (partitioned drives don't count). My advice is geared toward laptop users, people who can't add an internal drive, or users who plan on transferring projects between studios.)

2) No Filing System
Unless “cluttered-mess” qualifies as a filing system, most newbies scatter their saved session folders all over the place. Or worse, they just save sessions to whatever black hole the default save-to window suggests. Both bad news when you need to find a session you were working on last month. My advice: Come up with a filing system and stick to it. That way you’ll always know where to locate your sessions.

3) No Mouse (For Laptop Users)
Using the trackpad on your laptop is a recipe for frustration and insanity. Using that confounded device will drastically hinder your ability to navigate your session quickly and efficiently. Just get a fricken mouse and stop saying, “Ooops…ooops…ooops.”

4) Crappy Headphones
Ear buds or $20 headphones won’t let you hear what you need to hear. Invest $100 or more on a decent pair of closed-back headphones and you’ll actually be able to hear what you’re doing. A good place to start is with the Sennheiser HD-280 Professional Headphones .

5) Template Fear
If you click “Create blank session” every time you create a new session, it will take you 10+ minutes to set it up the way you like it. There’s nothing that will kill an inspirational burst of creative energy more than setting up your session or creating tracks. The solution?: Make a simple template with all your favorite track types and settings so you don’t have to pull a Sisyphus and start from scratch every time you open a new session. It’s not hard, and there are tons of video tutorials on how to set up and create a template on youtube. In an upcoming screencast, I also intend on showing you all my favorite session settings.

6) Keyboard Shortcut Fear
Even with a mouse, you can waste a lot of valuable time clicking around everywhere in the middle of your session. For example, why would you drag your mouse over to the transport and click the play button if you could just hit the spacebar to start/stop playback? Exactly. I’m not talking about memorizing all 40 pages of shortcuts. But learning a few time-saving shortcuts could really make your Pro Tools experience more enjoyable. Here are a few common ones to get you started:

• Start/stop playback: spacebar
• Turn click track on/off: 7 on numeric keypad
• Arm transport and start recording: F12 or 3 on the numeric keypad
• Create new track: Shift + cmd + N (Mac); Shift + cntrl + N (PC)
• Activate the smart tool: cmd + 7 (Mac) or cntrl + 7 (PC) on the qwerty

keyboard
• Bypass a plug-in: cmd + click (Mac) or cntrl + click (PC) on plug-in

name in the insert section
• Undo: cmd + Z (Mac); cntrl + Z (PC)

(@CreateMusicPro posts daily tips about using Pro Tools, and many of those tips include useful keyboard shortcuts)

7) Using Too Much Reverb/Delay
I know it’s exciting…look at all the cool plug-ins you can use now! Yea! But here’s the thing: just because Pro Tools allows you to easily work with plug-ins doesn’t mean you have to drench your tracks in reverb, delay, and/or distortion. “But I’m embarrassed of my voice,” you say, “I have to use a lot of reverb.” I know, I’ve heard all the reasons. If you want to continue sounding like you’re making amateur home recordings in your bedroom then keep drowning your vocals in large cathedral reverberations. If you’re trying to out-fuzz all the stoner rock that’s ever been made, go ahead. But if you’d like to up the commercial viability of your music and improve the quality of your tracks, add reverb, delay, and distortion like you would add pepper to food. A little bit goes a long way.
In a related note, I’ve seen a lot of people use reverb as an insert. If you do this, skip to 9) really quick and read it…I’ll wait. Okay, thanks, I can now let you in on standard operating procedure for time-based effects: Learn to set up a send and put your reverbs and delays on aux tracks instead of inserts. Learn why from my book recommendation in 9).

8) Magic Bullet Mindset
Many excited musicians buy Pro Tools with the expectation that it’s gonna be the audio equivalent of a robot vacuum. New users soon discover that Pro Tools won’t do a damn thing on your behalf. There is no “set-it-and-forget-it” button. It’s a tool, and like most tools, it’s as only good as its operator. In a similar vein, many folks buy amazing plug-ins with a parallel mindset. I can’t tell you how many people I’ve helped that have Pro Tools M-Powered, a M-Audio Fast Track interface, AND have also somehow acquired the Waves Mercury Bundle (I’m assuming through “alternatively-legal” means). What’s the point of having the best plug-ins if you don’t know how to use them? Yes, their presets will sound better than your stock Pro Tools plug-ins, but presets generally suck. There is no “magic” setting that will work for every recording/mixing situation. Pro Tools and plug-ins are tools, not dust-sprinkling fairies. Sorry, but you’re gonna have to study daily and work hard to record/mix great music…just like every other mortal out there.

9) Clueless About Recording
Many people I work with haven’t a clue about basic recording principals. I know this isn’t directly Pro Tools related, but it definitely affects your ability to accomplish what you’d like to do. You bought ProTools so you could record, right? Then you need to become educated about how recording works. For example, it’s not uncommon for beginners to invest a decent amount of money on a great mic. Good move, if you ask me. But then they take that great mic and place it on a table (no mic stand or pop filter) in the middle of a large, tile-floored room. No joke. If you read Jeff Strong’s “Home Recording for Musicians for Dummies” then you would know that capturing vocals is best done with a mic on a mic stand with a pop filter that’s sitting in some kind of “dead” space. A walk-in closet with lots of clothes works way better as a tracking booth than in the middle of your tiled kitchen. But, I digress. My point is that you’re gonna need to acquire a basic understanding of how the recording process works before you can best use your software to produce the kind of results you expected when you first purchased Pro Tools in the first place. If we were all living in the Matrix, then I’d recommend the “Comprehensive Recording Skills” mental download, but we’re not, so I guess I just have to recommend a lot of book reading, online tutorial study (AudioTuts+ is good), and youtube searching (try WinkSound for ProTools specific recording tricks). I also suggest subscribing to Recording Magazine . Even if you can’t decipher what you’re reading initially, it’s a great way to gradually become acclimated to the weird world of recording. (In fact, I highly recommend reading through their "Beginners' Series." If you're brand new to all of this, most of the content might go over your head. But it's chock full of newbie goodness.)

10) Manual? What Manual?
Whenever I ask my Dad for help with a complex electronic device his reply is always the same: “Read the Damn Manual!” Let’s face it, to figure out how-the-hell Pro Tools works, at some point you’re going to have to read portions of that 1,000+ page document Avid calls the “Reference Guide.” Ignoring it like it doesn’t exist will just cause you pain in the long run. So, let me walk you through the “creative person’s way” to use any manual. First of all, always at least read through the quick start guide. That should get you up and running as well as introduce you to the terminology of the program. From there, treat the Reference Guide like any other reference: read it when you need it. If you can remember the correct terminology for what it is you’d like to do, then just enter that term into the “Find” box of Adobe Reader or look it up in the index. Search this way until you find the correct portion of the Reference Guide and then only read the applicable information in that section. Solve one problem at a time. You’ll be tempted to follow the many labyrinthine paths that lead off into the nether regions of the document, but beware… before you know it you’ll forget the original reason you turned to the Reference Guide in the first place. I’m assuming you’d rather be creating music, no? If so, then troubleshoot one issue at a time. Or, just hire me to solve your problems for you. Which method sounds cheaper?

11) Unrealistic Expectations
Hey, if Spinal Tap’s amps went up to eleven, then I’m allowed to make an eleventh point in a top ten list! Unrealistic expectations, while not Pro Tools specific, can hamper your progress toward recording enlightenment. Recording with Pro Tools will seem like a magic voodoo art for a while, especially if you took 9) and 10) seriously. I’ll be frank: at first you will not be able to hear the effects of some basic but crucial recording procedures. For example, when I teach clients about leveling out a vocal recording with a compressor, many cannot hear the difference when I toggle the bypass. Same with EQ. Subtle EQ moves are hard to hear. I’ve even had people struggle to hear a high-pass filter totally eliminating everything below 300Hz on a mid-range instrument. When this happens to you, you might find yourself saying, “Well, if X effect makes a barely audible difference, I don’t see why I have to use it…no one’s gonna notice.” Ooooooooo…bad idea. Subtle effects build up. Compare your dry vocal to a vocal that’s been processed with tasteful amounts of EQ, compression, reverb, and delay, and then you’ll hear the difference. Even when you can hear subtle effects at work, you may question whether it’s really worth all the effort it takes to add ‘em. Trust me on this one: processing audio with effects will take your recordings to the next level, just like basic “developing” and sharpening techniques in Photoshop will turn a cool picture into an amazing photograph. The hard truth is that it’s gonna take a while to hear like mix engineers hear. Then it takes double that time to be able to apply effects judiciously. Be patient. That dog-eared kind of hearing and knowhow will come through study and experimentation. Again, Pro Tools won’t do it for you. But once you get the skills, Pro Tools will allow you to execute most of your recording tasks quickly and easily.

Happy ProTooling!

For daily tips and links on recording, songwriting, music production, and Pro Tools, follow Create Music Productions on Twitter @CreateMusicPro

Sunday, August 15, 2010

Bad Mixing/Mastering Advice Rant: "If It Sounds Right, It Is Right"

I read a lot on music, so I've come across my share of interviews with pros in the field of recording. When asked about the specifics of a particular mixing/mastering technique, I've noticed that many guys will respond something like this: "Man, if it sounds right, it is right." Then they talk about how one time they had to boost the snare by 16dB at 5.38kHz and it really made it pop. The album made platinum and the mixer was presented with the “Best Snare Sound Award” from the Canadian Council of Superior Recordings.

That’s a great story and all, but in my opinion “If it sounds right, it is right” is the worst piece of advice you could ever give someone learning about mixing/mastering. Why? Because most newbies to recording have neither the experience nor the training to be able to hear the way a mixing/mastering engineer has learned to hear. What sounds right to a newbie could sound right for all the wrong reasons. Amateur recordists should actually dedicate a fair amount of time trying to learn what it is exactly that the pros are hearing.

Once I was...eh-hmm…"mastering" a track and trying to give it some sparkly top end clarity like a radio cut. Over the course of the session, I thought I was making all the right moves. In my mind I was a mastering badass. The next morning I almost wet myself when I heard how absolutely horrible I made the track sound. Instead of making it sound radio-ready, I made it sound like a straight pin was used as a stylus on a record player.

My point? Newbies don't know what "right" sounds like. Heck, it took me a good year before I was able to hear how each of the parameters on a compressor changed the sound of the effect. Do you remember your first experiments with EQ? At that early point in our development as mixers, how were we supposed to know what a tasteful amount of EQ sounded like? I know I‘ve made my share of bad mix moves over time. But through these mistakes—and hopefully through critique as well—we slowly start to understand how a pro hears.

Anyhoo…now that I’ve been around the block a few years, I know what the pros really mean when they say "If it sounds right, it is right." So, let me translate for you, because I think it’s instructive. Here’s the translation:

“In my 25 years experience working in the recording industry on hundreds of major-label projects, where I've become extremely familiar with the best gear money can buy, I have learned through countless opportunities of trial and error that occasionally it's okay to violate a general recording guideline in order to achieve the sound I think will benefit the song as a whole. And even though I will sometimes push a principal beyond what is typically acceptable, I make sure that my decision will not jeopardize the sonic integrity and fidelity of neither the individual part nor its relation to the whole."

This is what they mean. Not as easy to toss off as a zen-like maxim, I know. But, until you're in their same situation, which won't be for a while, you may think twice when the violation of a generally-accepted recording axiom sounds "right."

My advice: if you're new to mixing/mastering or recording in general, just stick to the general guidelines you read about in trusted books and blogs. You might not create stellar mixes but they're also not going to suck really bad because you decided that boosting all the tracks 12dB at 2kHz sounded “awesome.”

So, what can you do right now to start hearing like a pro? Continue making and learning from your mistakes. Try out the suggestions given in books and magazines. Get advice and critique from someone who’s ahead of you. Train your ears with products like David Moulton’s Golden Ears, or take the quizzes at sites like Easy Ear Training or Dan Comerchero's QUIZTONES. Watch mixing/mastering tutorials with your headphones on. Take mixing lessons from a local mix engineer. Read Bobby Owsinski's isolated track analyses and listen for what he hears. Look for tutorial sites that include audio examples, like AudioTuts+. Study those examples until you can hear what they're hearing. It won’t happen overnight, but you’ll slowly improve your ear over time. Until then, appreciate the level you’re at right now and have fun.

Happy Mixing!

FOr daily tips on music production, recording, songwriting, and Pro Tools, follow Create Music Productions on Twitter @CreateMusicPro

Thursday, August 12, 2010

Musical Filler as Production Tool

The vinyl noise on YG’s “Toot It and Boot It” sounds like it’s been added to the sample, or at least hyped to extreme loudness. But I don’t mind at all. In fact, it’s a great production trick!

“Toot It & Boot It” is a relatively simple track when compared to other songs in the same genre, and lack of complexity can sometimes work against you in a recording situation. Too much “silence” in music can be deadly, especially for music geared toward commercial success. So if there’s something missing in your sparse arrangement, there are a few tricks you can use to fill-in-the-blanks.

The most obvious are pads and percussion. Subtle sustained chords do wonders to add ambience to a track that needs it. Shaken percussion can also add “something” to a track that sounds like it “needs something,” and has been a tried-and-true producer technique for years. Their high frequency energy will also add a crispy balance to the usually crowded low-mid-range. Listen to the claps and metallic jangly thing at the intro of Linkin Park’s “I’ve Given Up.” Now imagine if the intro consisted of just the guitar, which is what most amateurs would have done. Boring. The claps and jangles add so much energy, which fills empty musical space and gives the listener an idea of where the track is heading.

Another trick is to add a simple but cool sound. The eerie sound that runs through “Boom Boom Pow” is a great example. The Black Eyed Peas use it as background filler as well as weave it in and out of the musical texture to keep the arrangement fresh. Notice how it fades out when Fergie first comes in, but then comes back at the first chorus. This keeps the track moving without adding too much variety (which can distract from the vocal and disrupt the groove).

People-noise can keep a track from sounding too sparse. Listen to the hooting crowd that runs throughout Kanye’s “Homecoming.” Linkin Park’s “Bleed it Out” also uses the sound of a crowd to keep the intro guitar part from sounding too “alone.” The crowd also serves to add angsty energy to the track as a whole. Nice.

There are less obvious ways to add much needed sonic filler. On the really subtle side tape emulators come to mind. Tape hiss has “warmed up” analogue recordings for years. White/pink noise can also work in rare circumstances, although it is far less musical. That kind of noise is usually used to dirty up a synth sound. (…But if your synth sound lacks texture, consider adding some noise!) Nine Inch Nails uses a wind sound (probably a synth-generated sound effect) throughout “Hurt,” and it helps evoke an emotional affect and fills the void.

Vinyl noise also falls under the above category. This iconic phonographic artifact can actually do a lot to not only fill the void, but “glue” the rest of the sounds together. According to Gestalt theories of perception, a “figure” needs a “ground” to be noticed. For something to be in the foreground, there must be a differentiating background to give it contrast. The hyped vinyl sound in “Toot It and Boot It” works well as filler to keep the simple arrangement from sounding too vacant, but it also acts as a foundational bed that unifies the piece as a whole. The scratchiness of the vinyl is the field on which the musical play happens, and allows the old sample and the new drum/vocal production to collaborate instead of clash. When the sample drops out toward the end (around the 3-minute mark), notice how something sounds missing? The drop out adds needed contrast at that point, but when the sample returns in all its vinyl-rrific glory, it just sounds better.

If all that sounds too academic, then I’ll simplify: pads, percussion, crowd sounds, synth effects, and vinyl noise are tools in a producer’s bag that she will sometimes use to rescue a sparse track from the void. This kind of subtle production “voodoo” is often what differentiates an amateur sounding recording from a professional one. Try it out.

If you have used a similar effect, please leave a comment explaining what you used and how you used it.

Happy Producing!

For daily tips on recording, music production, songwriting, and ProTools, follow Create Music Productions on Twitter @CreateMusicPro

Monday, August 9, 2010

Pro Tools TIP: The Balanced-Levels-But-Clipping-the-Master-Bus Problem and How to Solve It.

Important!: In October of 2010, @RandyCoppinger showed us a simple but brilliant way to adjust all volumes on every track (including automation) in one swoop: http://www.youtube.com/watch?v=Q0mujYBo72U It's nice to know the method I describe (below), but his way is easier and faster. Thanks Randy!


This seems to happen to me more than I care to admit:


During a mixing session I've got my individual track levels all balanced with each other

and it's sounding great. BUT...then I look down only to discover that I'm clipping my master bus. Bad news. The first thing that comes to my mind is "Oh crap, am I really gonna have to pull down each fader one by one by the same level until I get my master fader in the yellow?" You see, I don't want to lose the balance I just spent hours perfecting, but I also don't want to adjust 30 faders. What to do?


Never fear, I have a solution for you.


Select ALL in the groups area of the edit window (below the tracks list: View>Other Displays>Track List ) and pull down the master fader until the level peaks around -5 to -7dB.


(Why so low? I"ll explain that in another post.)


Notice how all the faders in the session move together by the same amount because you ALL have selected. Then simply deselect ALL from the groups window and bring the master fader back to 0dB (option-click* the volume readout or fader on either the mix or edit window).


What you've done is quickly eliminate your clipping problem while retaining your overall level balance. Yea!


Now, this trick only works easily if you haven't added any volume automation. In fact, this is one of the reasons I sometimes will wait as long as I can to add any volume automation moves to my mix. But, if you already have volume automated somewhere, the world hasn't come to an end, you just have to do an extra step.


Here's what you do:

Triple click in the automation lane to select all automation points and, with the smart tool, move the cursor to the top of the track until it turns into that Tron-looking sideways cursor. Then, click-hold and pull down the same amount of dB's that you had to pull down on the master fader in the first trick.


This will lower all automation points in that track evenly. But notice how the Tron-cursor (not an Avid term by the way) moves in large increments? To fine tune your moves, hold down command* after you click.


> > > > > > > > >


The above trick also works if you've achieved a level-balanced mix where the master bus is peaking way too low. You can bring up the global level in the same way. (Although, take care that no individual track clips as a result.)


Eventually you'll learn how hot you can push your volume faders at the beginning of the mix so you won't clip the master bus later. But until that happens, I hope this trick helps save you a bunch of time.


Now, if you see a problem in my solution to the balanced-levels-but-clipping-the-master-bus issue, please let me know. Also, if you have a better or alternate way of solving this problem, please post it in a comment so we can all benefit from your knowledge.

Important Addendum:
@edgenificent pointed out that the above trick works, but may not be necessary. Citing an article called "Keep Your Headroom" by Mike Thornton from the June 2010 issue of Sound on Sound, he politely informed me that bringing down the master fader to keep the mix bus meter out of the red isn't that big of a deal. To quote the article, "The take-home message is that yes, it is okay to just bring down the master fader a bit if you get a clip on its level meter." The rest of the article is worth the read, and can be purchased for $1.50 from Sound on Sound:
http://www.soundonsound.com/sos/jun10/articles/pt_0610.htm


Happy ProTooling!


Follow CMP on Twitter @CreateMusicPro


*keyboard shortcuts given apply to a Mac

Sunday, June 27, 2010

Content Coming Soon...

Content Coming Soon...

Hey guys, eventually this will become the place where I can venture out beyond the 140 character limit of Twitter and into some serious tutorials. But for now it just sits here.

In the meantime, follow Create Music Tips on Twitter @CreateMusicTips

Follow Create Music Tips on Twitter

For daily tips and tutorial links on creating music (songwriting, recording, and performance), follow Create Music Tips on Twitter @CreateMusicTips